ClockRite Sage Integration Manual
Paid hours and Absences can be exported from your ClockRite Software into Sage Payroll. This guide explains how to set up this integration and the process for importing paid hours and absences from ClockRite into Sage. Instructions under a blue heading concern your ClockRite Software, while instructions under a green heading concern Sage. Please take the time to read and carefully follow these instructions. You can contact us on 01246267715 or through support@clockrite.co.uk for assistance with any stage of this process.
Step 1: Initial Employee Setup in ClockRite
Users must first set each Employees' Sage references in the ClockRite Software. This can be done in the Employee screen

Once the Sage Pay Frequency and Sage Employee Reference Number have been set, please move on to Step 2
Step 2: Identifying Sage Pay/Absence Elements in Sage
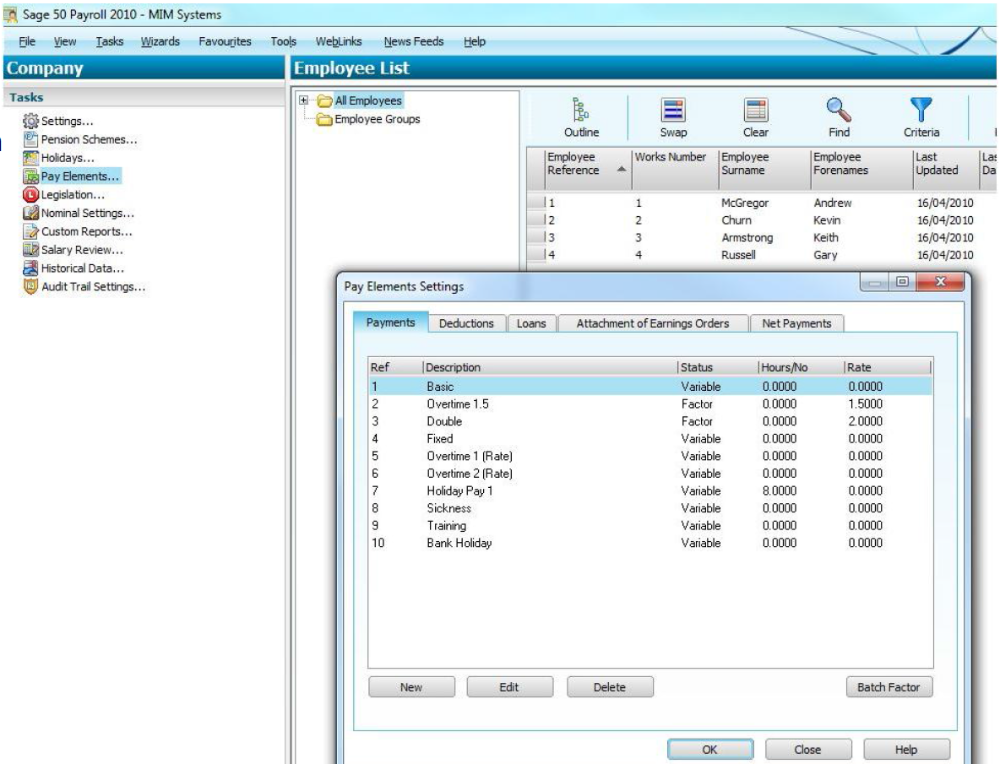
Sage uses Reference codes to track Pay Elements. These codes must be matched with codes in your ClockRite Software in order to accurately integrate hours into Sage. Sage displays Pay and Absence Elements together, but users will need to separate the two in order to enter them into the ClockRite Software. Open Sage and click on Company, then Pay Elements
Take note of which Pay Elements are in use. Identify which Pay Elements are related to Absences and which are related to Basic/OT Pay. You may wish to use the tables below to record Sage Pay Elements.
We recommend marking all obsolete codes as dormant.

Adding Sage Pay Elements to Employees in Sage.
Once Sage Elements have been confirmed, users must ensure that Absence and Pay Elements are correctly assigned against each Employee in Sage. Please thoroughly check each employee and add all necessary Elements to their record.

Employees with incorrect or missing elements will not be correctly imported from ClockRite
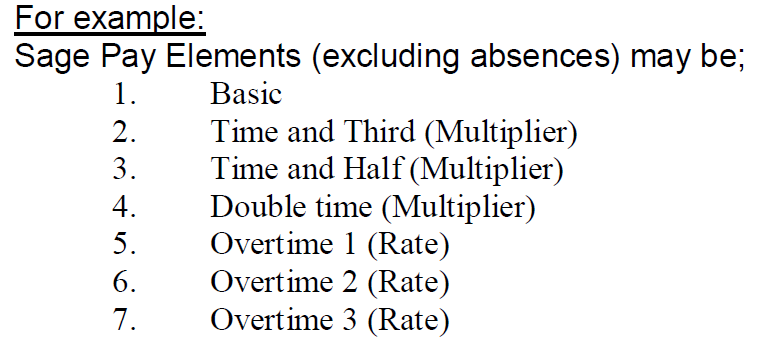
If Employees Use Different Pay Elements (excluding absences)
It is possible that different Employees will use different Pay Elements in the Sage system (e.g: paid by rate/multiplier, or entitled to different overtime rates). If this is the case, users will need to take note of all possible combinations of Pay Elements (excluding absences) in Sage in order to correctly import hours from ClockRite.
You may wish to use the table below to make note of different employee groups, along with the Sage Pay Elements assigned to them (up to a maximum of 5).

Step 3: Adding Sage Pay Elements to ClockRite
Configuring Absence Codes in ClockRite
Once Sage Pay Elements have been confirmed, they can be added to ClockRite. We suggest that you start by adding Absence related Pay Elements. To do this, go to the Holiday and Leave screen and select the Absence Codes tab.

Match the Absence References from Sage (see page 3, table 2) with any of those from ClockRite that you wish to link to Sage, then insert the relevant Sage Element Number against them. Any unused or irrelevant paid absence codes can be deleted. Where Absence related Pay Elements from Sage do not match currently existing Absence Codes in ClockRite, create new ones using the highlighted button, or edit existing codes.
Unpaid Absences must be set to '0' or deleted from the absence screen if you do not intendto use them for reference in your ClockRite Software.
Configuring Sage Pay Links in ClockRite
Sage Pay Elements dealing with basic and overtime pay are linked to ClockRite through Sage Links. These can be found and configured under File, Sage Setup. As explained on earlier, it is possible that different employees/groups use different Pay Elements (eg: some paid by multiplier, some by rate). In this case multiple Sage Links must be created to match all existing combinations of Pay Elements in the Sage system. These must then be matched against Pay Rates (basic and overtime rates) in ClockRite.
Using this example, two groups of employees (one paid by multiplier and one by rate)
would be configured as follows:
Using this example, two groups of employees (one paid by multiplier and one by rate) would be configured as follows:

The above examples would be entered into the ClockRite Software as per the screenshot below. Please see your ClockRite Shift Manual for advice on how to configure pay rates in ClockRite.

New Sage Links can be created using the "white page" new button. The number of Sage Links needed will depend on the complexity of the pay system in use. Some companies may only require one Sage Link, while others may need several. If you made use of the table on page 4, refer to it here in order to set Sage Links correctly.
Assigning Sage Links to Employees in ClockRite
Once all Sage Links have been configured they can be assigned against Employees in the Employee Screen Use the Sage Paylink Group field to assign Sage Links to employees.
Take care when doing this, as employees under the wrong group will not have their hours correctly imported.

Importing From ClockRite to Sage
Step 1: Rectifying Uneven Clockings in ClockRite
Sage will not accept imports from ClockRite when there are Uneven Clockings in your Time and Attendance data. We recommend rectifying any Uneven Clockings before beginning the Sage Import Process.
Attendance data can be viewed in the Time & Attendance screen . It is important to regularly review this data for any errors or discrepancies. We recommend doing this on a daily basis, even if you run payroll monthly.

In order to ensure the accuracy of your Sage export, Uneven Clockings (where an employee has missed either an in or an out clocking, or clocked twice by mistake) must be identified and amended. These can be easily identified using the Next Discrepancy button, highlighted above. This button will take users through all Uneven Clockings, starting with the oldest by date. Discrepancies can then be amended by adding/deleting/altering clockings as needed.
In order to export Time & Attendance Data to Sage you must rectify all Uneven Clockings. Once this has been done, please move on to the next stage.
Step 2: Creating The Export File in ClockRite
ClockRite exports to Sage via a csv file. In order to create this export, go to the Time & Attendance screen . Click the Refresh button , followed by the Post/Export to Sage icon .

Select relevant groups and/or employees from the pop-up window, followed by the date range for which you want to export data.
Ensure the Including Absences option is checked, then click OK to create the file for export.
You will receive a message to say the export has been successful. The file will export to a specific place on your PC which you must then browse to via Sage. The default location for this export is C:\Temp\Sage. If you would like to change this location, go to File, Sage Setup in your ClockRite Software and browse to set a new location.

Step 3: Importing The Export File into Sage
Open Sage and go to File, Data Import, Import Sage Data. This will open the Data Import Wizard. The Wizard gives users the option to Backup Sage Data. We recommend doing this before importing from ClockRite. Once this is done, click Next.
If you want to clear previous payment please see this article on the Sage website about resetting payments.
Reset payments (sage.com)
Select Employee Payments (Hours and Rates) from the list of options. In the window that opens, select Browse. Navigate to the ClockRite Sage Export location as described above, then click Open.
Click Finish. The export from ClockRite to Sage is now complete.


