
Go2Clock - How to create and apply rotating shift patterns
We have made it easy to set up rotating shifts in Go2Clock. Employees can move automatically between different shift patterns on a repeating weekly cycle, for example days one week and nights the next. Once the rotation is set up, there is no need to change anyone's shifts by hand each week.
Before you start: make sure the individual shift patterns used in the rotation already exist. If you haven't created them yet, follow our Shift Setup guide first.
In this article
Step 1: Create your shift patterns
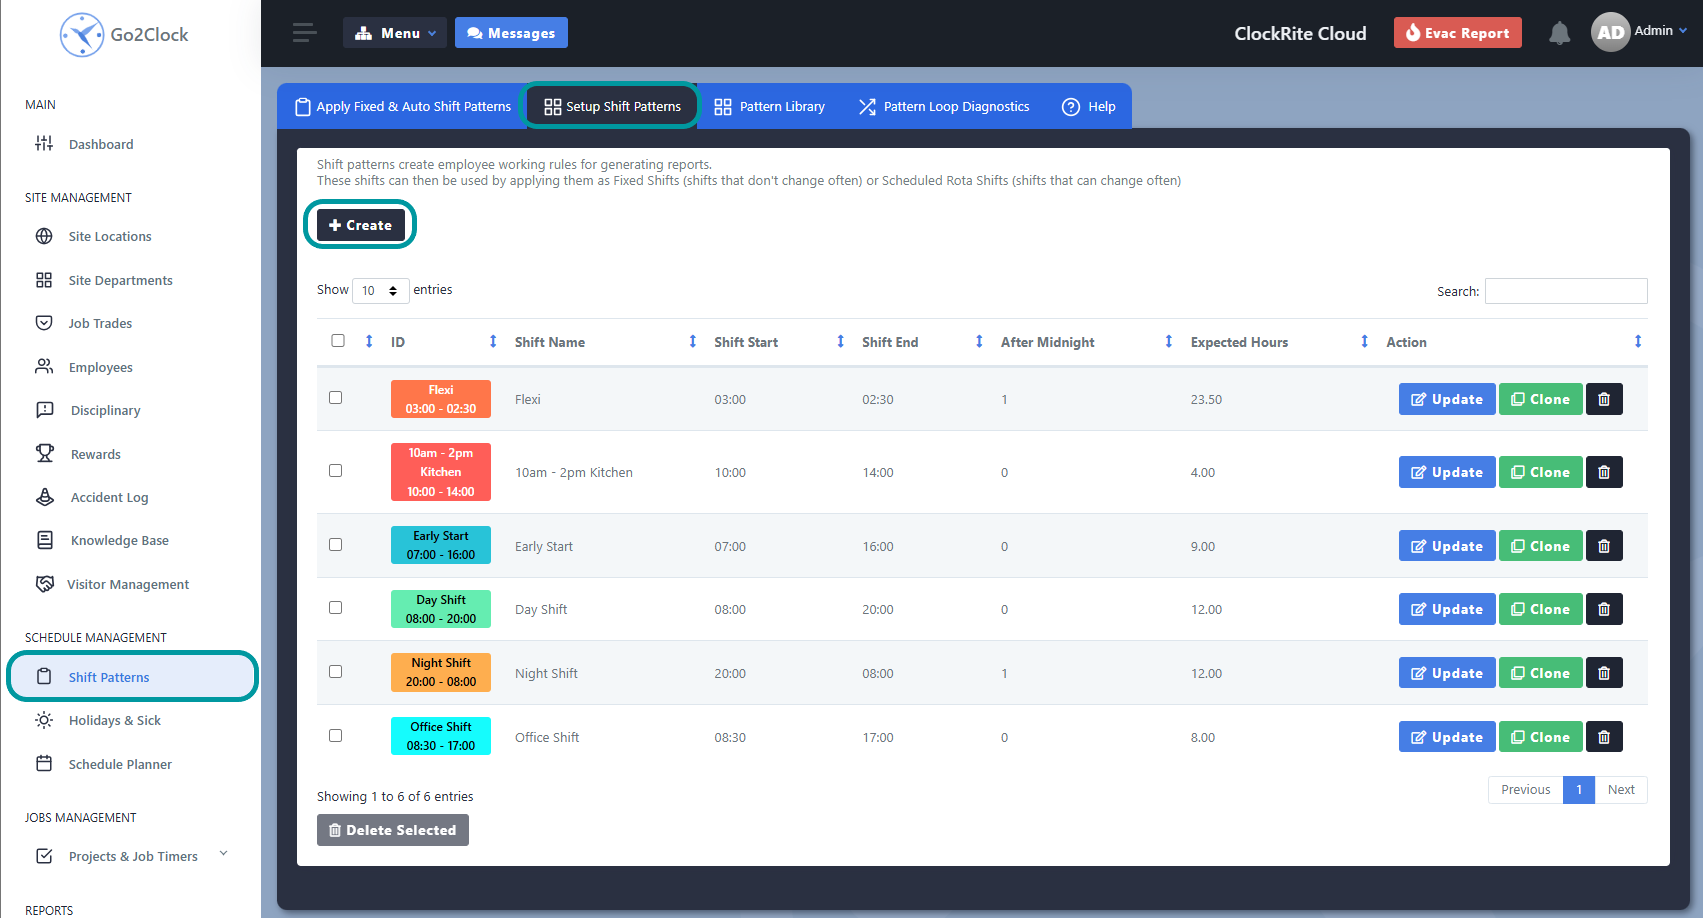
A rotation is built from individual shift patterns, so start by creating every shift you will need. Each shift pattern holds the rules for the hours worked, such as start and finish times, breaks and overtime.
- Go to Shift Patterns.
- Select Setup Shift Patterns.
- Click Create.
- Set up the shift rules you need. Our Shift Setup guide explains each tab.
- Click Create to save the shift.
Repeat this until every shift used in the rotation has been created.
Step 2: Create a pattern library
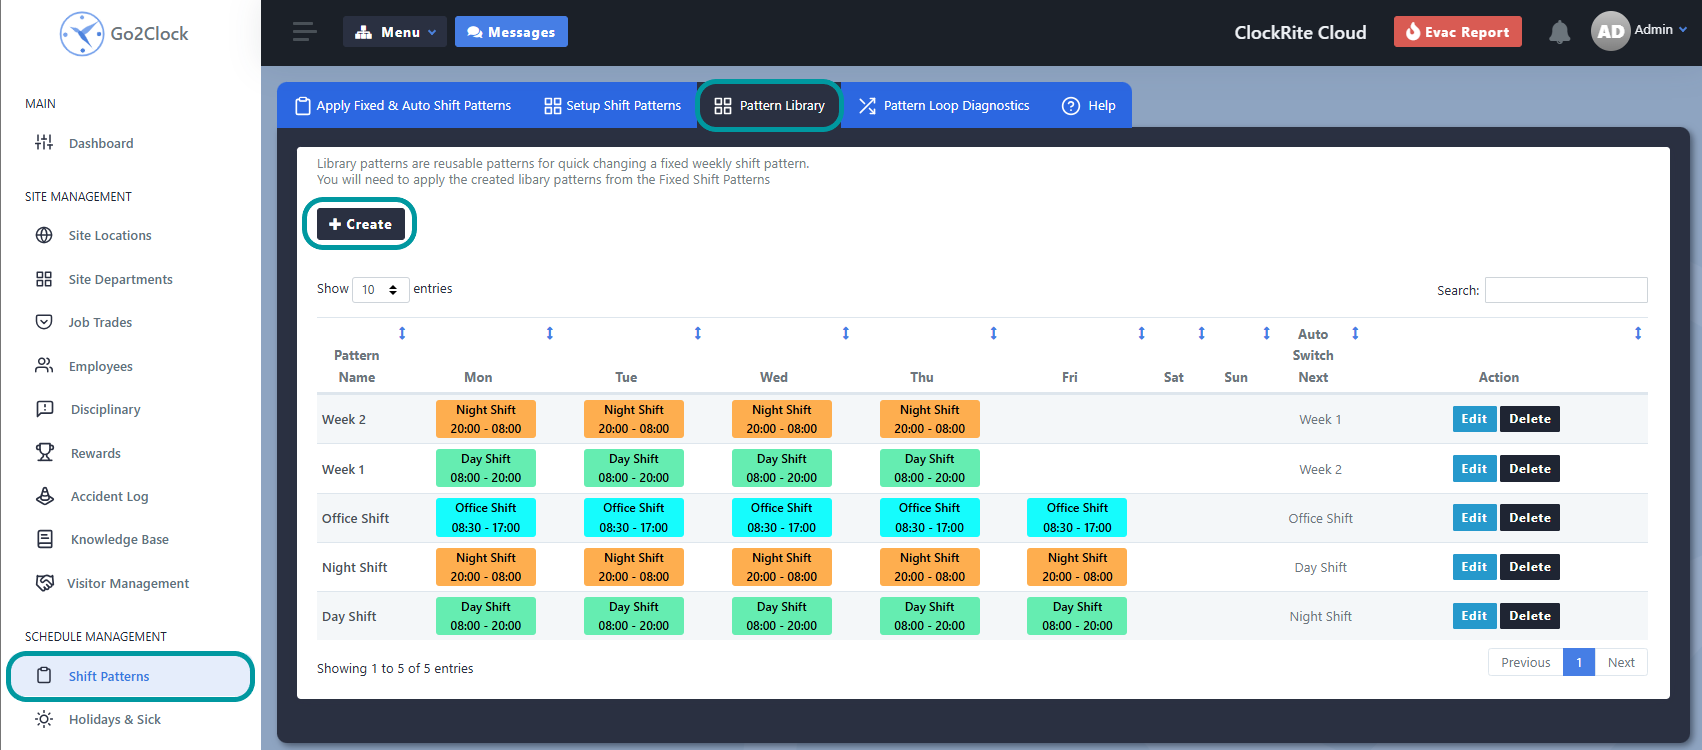
A pattern library is one week of the rotation. It sets which shift pattern applies on each day of that week.
- Go to Shift Patterns.
- Select Pattern Library.
- Click Create.
Step 3: Name the week and assign shifts
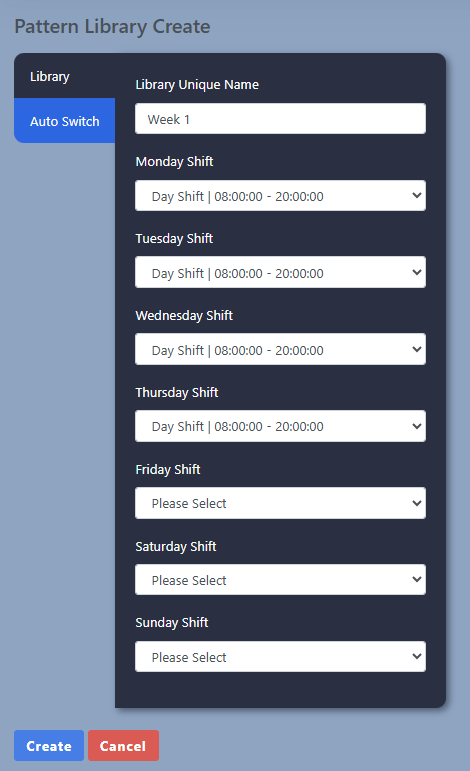
Give the pattern library a clear name, such as Week 1, then choose the shift pattern for each day of the week.
Repeat steps 2 and 3 for every week in your rotation. For example, a two-week rotation of day and night shifts needs two pattern libraries: Week 1 and Week 2.
Step 4: Link each week to the next
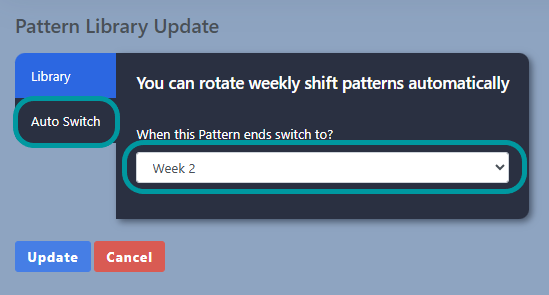
Once all your weeks are created, link them together with Auto Switch. This tells Go2Clock which week to move on to when the current week ends.
- Click Edit next to the first week in the Pattern Library list.
- Open the Auto Switch tab.
- In the dropdown, choose the next week, for example Week 2.
- Click Update to save.
Step 5: Close the loop
Do the same for every week in the rotation, so Week 2 switches to Week 3, and so on. Set your last week to switch back to the first. This creates a continuous loop, so the rotation keeps repeating.
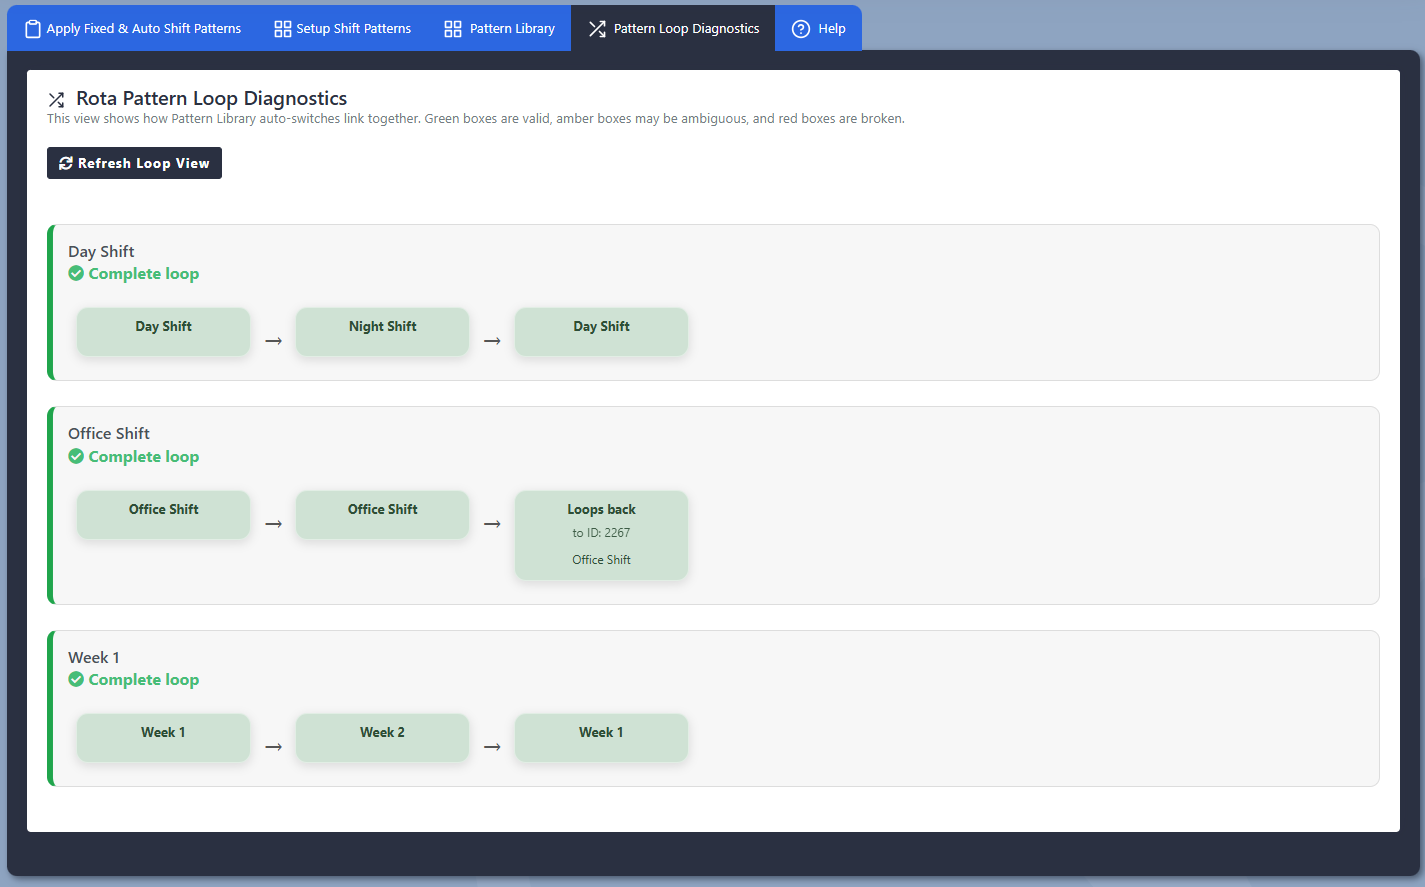
To check the loop, open the Pattern Loop Diagnostics tab under Shift Patterns and click Refresh Loop View. A rotation that is set up correctly shows as a Complete loop. Amber boxes may be ambiguous and red boxes are broken, so check the Auto Switch on those weeks.
Step 6: Apply the rotation to employees
With the loop in place, you can assign the rotation to your employees.
- Go to Shift Patterns.
- Select Apply Fixed & Auto Shift Patterns.
- Use the department filter to find the employees, then click View.
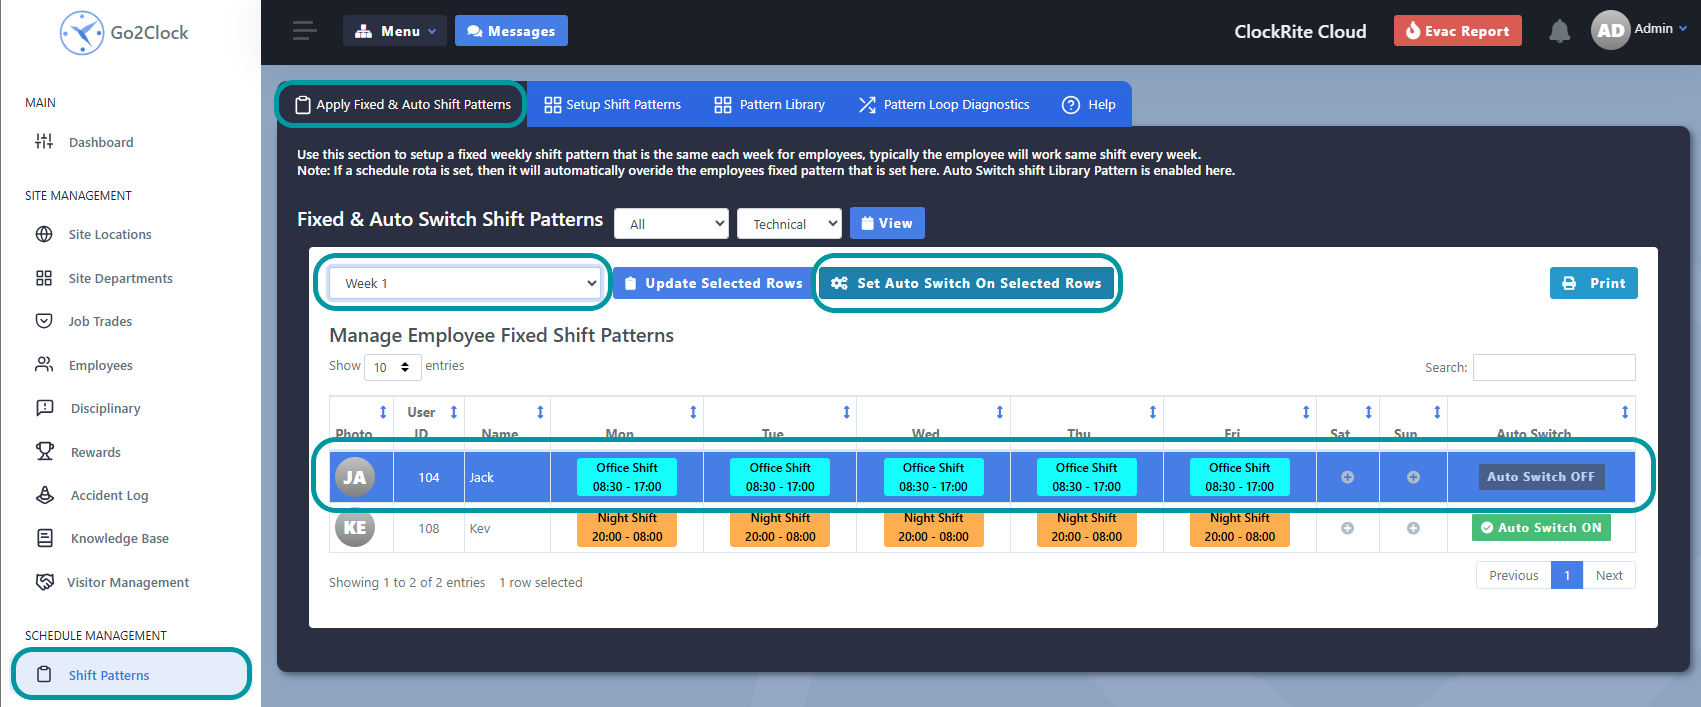
- Click each employee who should follow the rotation. Selected rows turn blue, and you can select several at once.
- In the dropdown on the top left, choose the week the employees should start on this week.
- Click Set Auto Switch On Selected Rows.
Step 7: Check the rotation has been applied
Check the employee's row. It should show Auto Switch ON, with this week's shifts shown against each day. From now on, the employee moves through the weeks automatically in the order you linked them.

Good to know: a rota entry for a specific day always overrides the rotation, so you can still make one-off changes without breaking the cycle.